Supplies:
- Five photos
- Creative Imaginations – Cheer Camp Paper
- Creative Imaginations – Cheer Stickers
- Adorn It – Etched Natural Stickers
- Stamping Station – Cheerleading Antique Stickers
- Stamping Station – Cheerleading Antique Paper
- Paper Trimmer
- Adhesive
- Cream Cardstock – 2 pieces
- Grey Cardstock
- Black Sharpie
- Black Ink
- Striped Paper
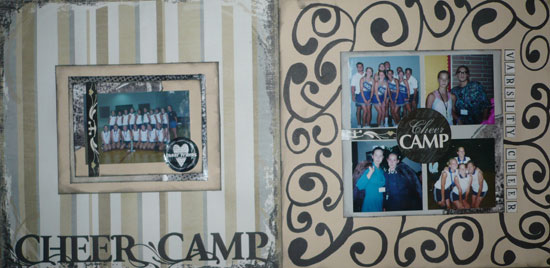
Step-by-Step Instructions:
- Cut 7” x 5 ½” piece of cream cardstock. Distress edges with black ink. Adhere to Cheer Camp paper.
- Cut 6” x 4 ½” piece of Cheer Antique paper. Distress edges with black ink and adhere.
- Cut 5 ½” x 4” piece of cream cardstock. Distress edges with black ink and adhere.
- Cut 4 ½” x 3” piece of Cheer Antique paper. Tear diagonally into a triangle shape. Distress edges with black ink and adhere in one corner of the last piece of cream cardstock.
- Trim photo to 4 ½” x 3” and adhere.
- Apply border and “Cheer Friends” stickers.
- Cut 7” x 7” piece of grey cardstock. Distress edges with black ink. Adhere to other piece of cream cardstock.
- Cut 2 ½” x 4” piece of Cheer Antique paper. Tear diagonally into a triangle shape. Distress edges with black ink and adhere in one corner of the grey cardstock.
- Trim four photos to 3” x 3” and adhere.
- Apply border, “Cheer Camp” and letter stickers.
- Draw swirl pattern with black Sharpie.
Click Here for printable instructions and to order all the products you’ll need to create this layout.
Happy Scrappin’
(Visited 87 times, 1 visits today)
Thank you for useful info. 🙂
Thanks very good for report, I follow your blog
very good information you write it very clean. I’m very lucky to get this information from
you.